Food Printer
A custom syringe-pump extrusion system for a Voron 0.2 CoreXY printer, designed to Direct Ink Write viscous food materials like pasta
- Date
- Domain
- fabricationhardware
- Stack
- Fusion · CAD · 3D printing · soldering · robotics
A custom syringe-pump extrusion system built to mount on a Voron 0.2 CoreXY printer, replacing the stock toolhead to enable Direct Ink Writing (DIW) of viscous food materials, with pasta dough and icing as the targeted materials. Part of the RAM Engineering collection at MakerFest Spring 2026, where we won the “Best All-Around” award.
Stack
- Fusion 360 for mechanical design and CAD
- BambuSlicer/Bambu Labs A1 mini
- Klipper + Moonraker + Fluidd for firmware and printer interface
- Raspberry Pi 4 as the controller
- KIAUH for Klipper installation and management
Process
The first major decision was to mount the pump directly on the X-rail carriage rather than use a Bowden-style tube feed. A tube was rejected early because compliance lag, unreliable retraction, and dead-volume accumulation all get much worse with viscous pastes than with standard filament. The resulting assembly was a hybrid of 3D-printed structural plates and metal motion components, following a fairly standard two-shaft linear actuator design. Food-safety considerations shaped several material choices. For example, the anti-backlash nut was POM rather than brass, since brass contains lead.
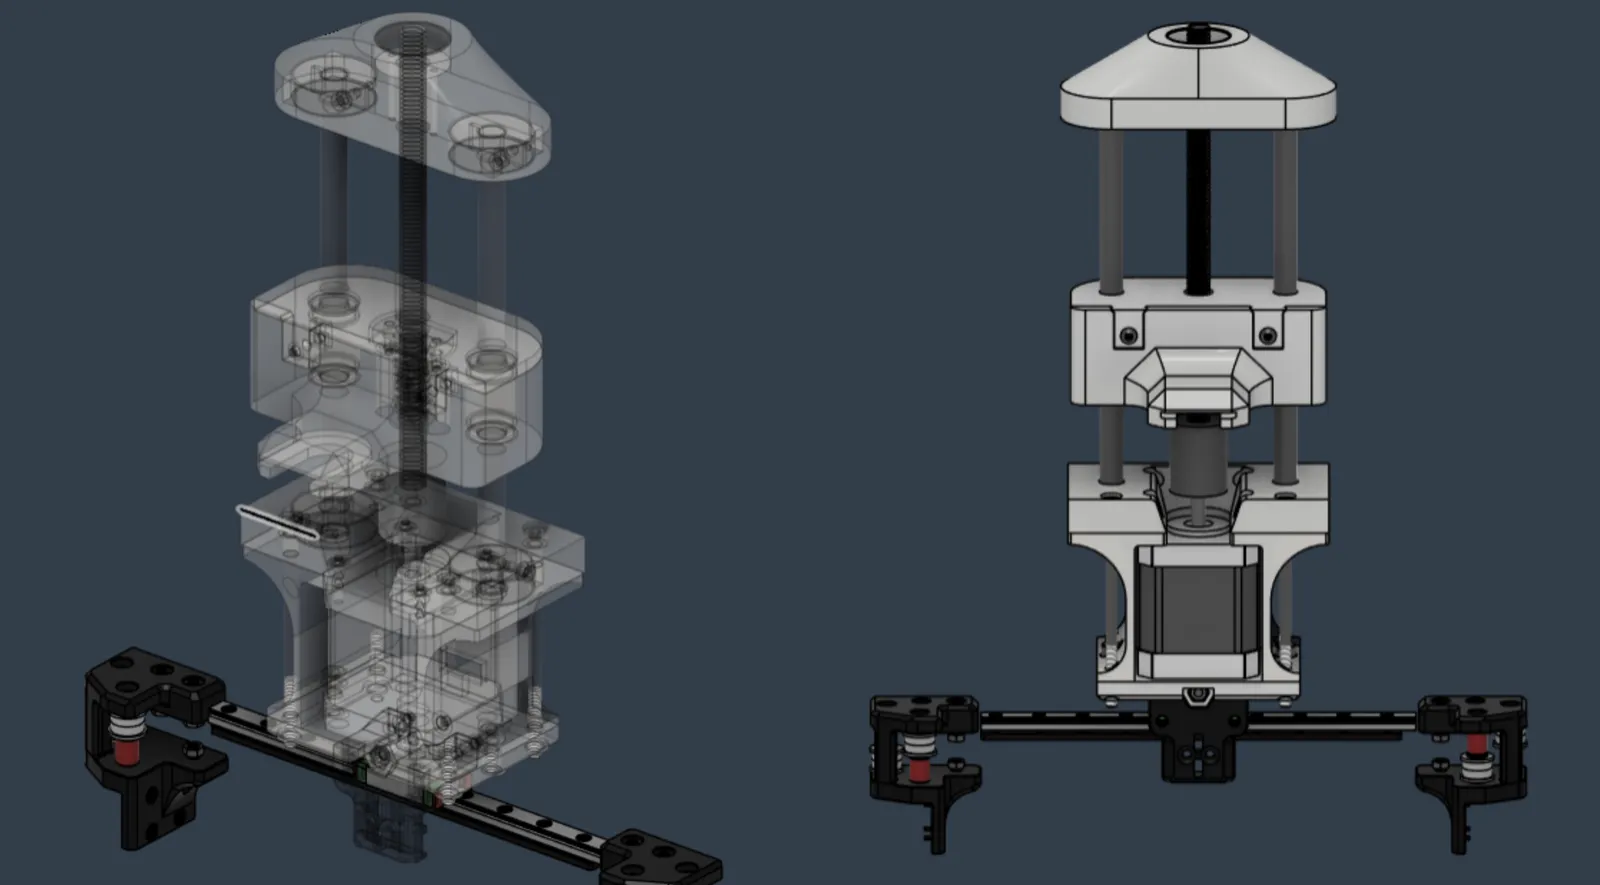
Most of my contribution was in CAD, and creating the design for the entire extruder system. The assembly is a vertical stack that had to satisfy a lot of constraints simultaneously: motor clearance, leadscrew geometry, syringe barrel clamping, and fitting within the V0.2’s internal volume, all without throwing off the balance of the gantry. Getting all of that to resolve in Fusion while keeping the part count reasonable was the main design challenge. Modelling our custom parts to fit securely within the complex stock carriage was difficult as well.
Sample CAD photos of extruder assembly:
I was also heavily involved in mechanical assembly of both the stock printer and our custom system. Coming in with no hands-on work experience at all, this was invaluable for building my confidence in using a wide variety of tools in an engineering context. Having to assemble my designs myself, I also had the oppurtunity to learn first-hand how important it is to consider the assembly process when designing a part, and to not be stuck only in CAD - some of my early iterations were downright impossible to put together!
Outcomes
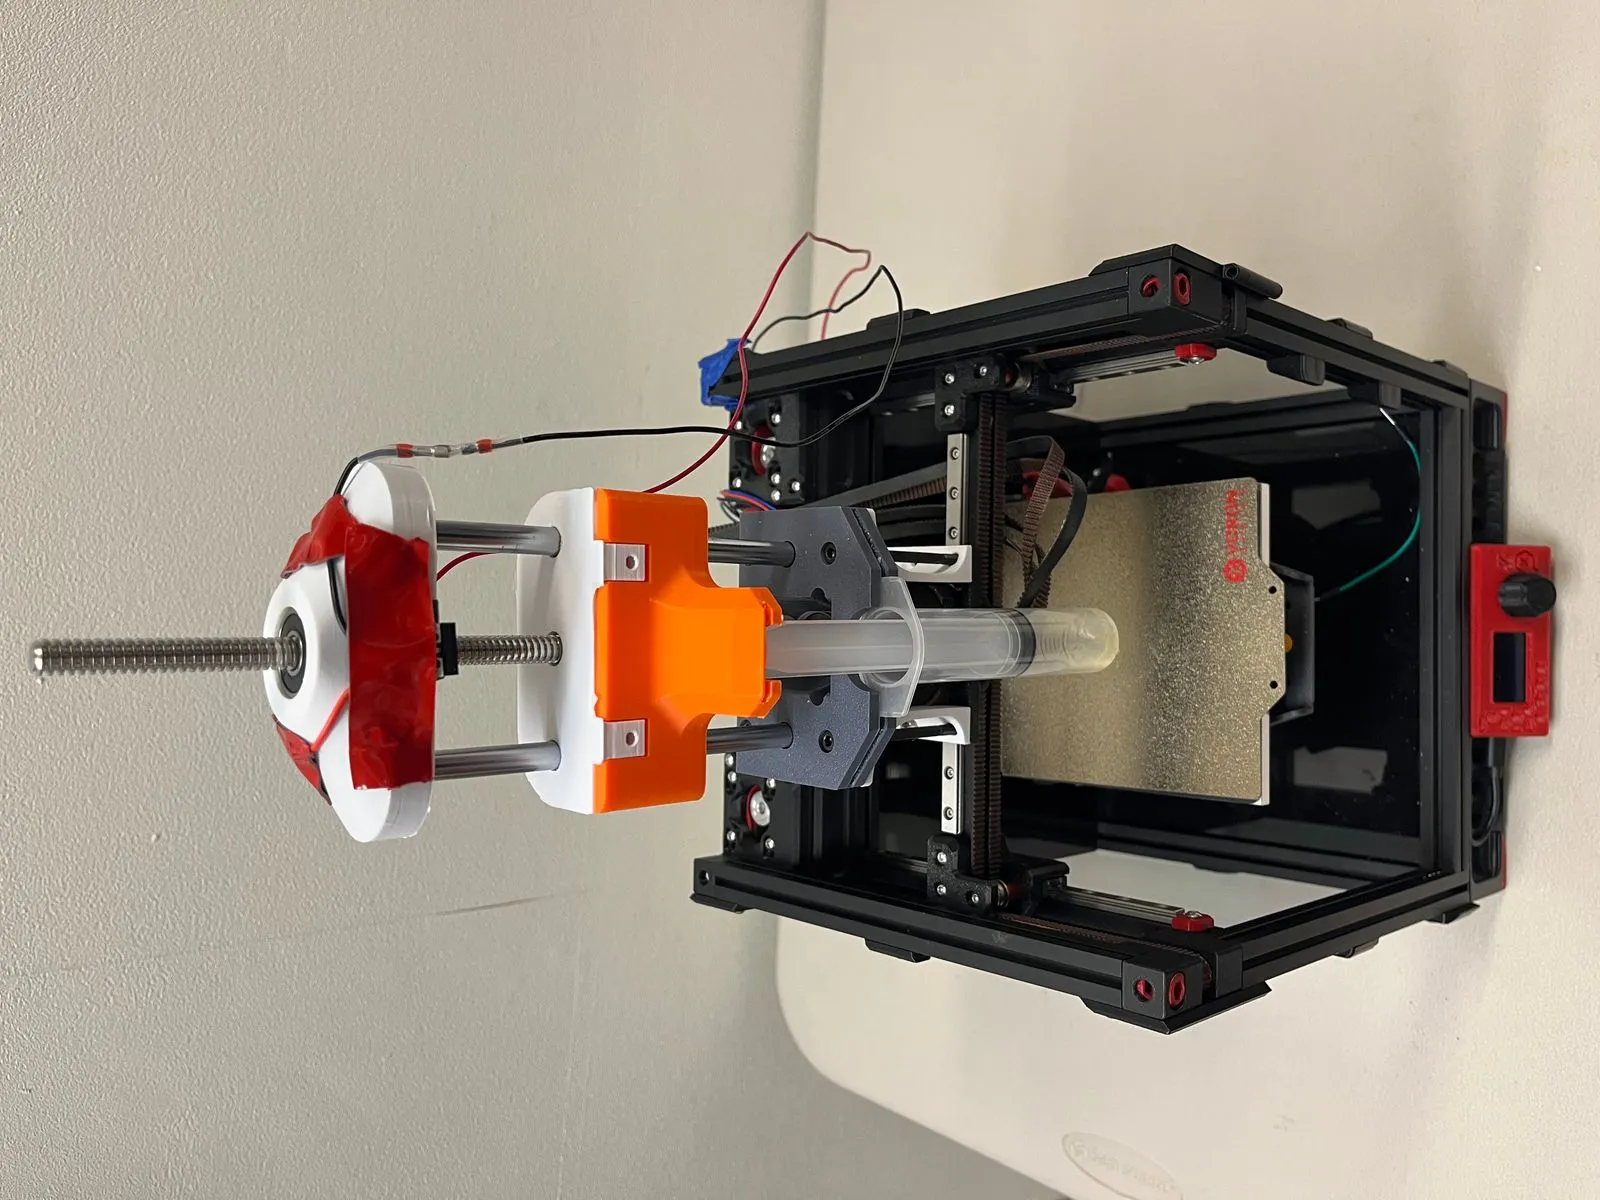
The mechanical design was completed and Klipper was running on the controller, with demonstrated fully-functional movement of all 3 axes + extrusion system. The project concluded before reaching a first print due to material issues, but the design decisions were fully resolved and the CAD was in a state that could be picked up and built from. A combination of too-springy extrusion material and our 3D prints bending under the >30 MPa backpressure made the response time of the syringe too slow for any meaningful long-term precision in extrusion.